Calzones

calzone with sauceCalzones always reminds me of my children when they were little.  I did not always want to make pizza, and calzones where a good compromise where I was also able to “sneak” in some vegetables.  The wonderful cheese filling always made me feel that they were having a good dose of calcium.  When it comes to calzones, using the freshest ingredients will make all the difference.  I use hand crafted ricotta and mozzarella and end up with a very fluffy calzone.  If like my daughter you are a purist, making your own dough can also be an option.   They can be made ahead of time, put in the fridge and baked later in the day.  Our family likes them served with a good helping of tomato sauce. Add in a big tossed salad and you have dinner!fresh cheeses

CALZONES (makes 4)

  • 1 lb pizza dough 
  • 1/2 lb ricotta cheese
  • 6 oz fresh mozzarella cut into small cubes
  • 1/2 cup fresh grated parmesan divided
  • 1 egg
  • 1/4 lb ham chopped
  • 1 tablespoon fresh basil
  • cracked pepper
  • egg wash : with a fork mix one egg and one tablespoon of milkcalzone filling

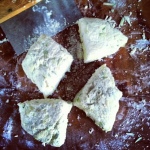
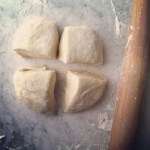
Let the dough come to room temperature (out of the fridge for about 20 to 30 minutes).  Cut the dough into 4 equal pieces.  On a floured surface roll each piece into 6 to 7 inch rounds.

In a bowl mix the ricotta, mozzarella and 1/4 cup of the parmesan .  Break the egg in the cheese mixture and carefully mix it in with a fork.  Fold in the ham, basil and a turn or 2 of cracked pepper.pizza dough
Divide the mixture equally between each piece of dough, brush the edges with the eggwash, and fold into a half moon making sure to seal the edges very carefully by pinching the dough together. To make a stronger seal push the edges of the calzone with a fork as you would for a pie.filling the calzone

Put the calzones on a baking sheet lined with parchment paper and a couple of tablespoons of corn meal scattered on the paper.  With a knife or scissors, cut 3 small holes in  each calzone ( this will prevent the calzones from bursting).  Brush each calzone with the egg wash making sure it does not drip heavily on the sides or the calzones will stick.  Sprinkle the remaining 1/4 cup of parmesan on top of the calzones.

Bake on the middle rack of a preheated 375 degree oven for 20 minutes, rotating the pan halfway through baking.calzone

Serve with your favorite sauce.

NOTE:  Thanks to my daughter Maya for the addition of the egg wash and parmesan, she is now the calzone expert in the family.  You can replace the ham for cooked sausages or 1 cup cooked spinach and onion – but make sure all the moisture is gone from the spinach or you’ll end up with a soggy calzone.

From my kitchen to yours,
CK, la fille du bouchercalzone

Tuscan (inspired) soup

tuscan soupI always feel soup is in order when the days get colder.  Here is a soup I like to serve on a Saturday for lunch.  Served with a big chunk of crusty bread and plenty of fresh grated parmesan it is a welcome meal in front of the fire while it is freezing outside. It is also a great way to enjoy all those winter greens available this time of year.  Experiment by substituting or combining kale, swiss chard or spinach.ingredients in bowls

TUSCAN SOUP (serves 4)

  • 2 tablespoon olive oil
  • 1 cup diced carrots
  • 1 celery stalk diced
  • 1 medium onion chopped
  • 2 garlic cloves minced or pressed in a garlic press
  • 1 chopped tomato or 1 cup tomato coulis
  • 6 cups vegetable or chicken stock
  • 1 teaspoon each oregano and basil
  • 1 cup zucchini diced
  • 4 (loose) cups baby kale
  • 1 can (15 oz) white beans

Heat the oil in a large stockpot, add the carrots, celery and onion.  Cook until soft, about 10 minutes.  Add garlic and cook until fragrant, about 1 minute.  Add the tomato or tomato coulis, stock and herbs and bring to a boil.  Reduce the heat to low and simmer covered 10 to 15 minutes.  Add the zucchini and simmer another 5 minutes.  Add beans, simmer another 5 minutes.  Off heat add the kale, cover and let sit 10 minutes.  Serve with grated parmesan.bowls and linen

NOTE:  This soup is great as a vegetarian meal but for you meat eaters, if you want a more robust meal you can add 8 oz of cooked sausages or grilled chicken when adding the beans.serving soup

From my kitchen to yours,

CK, la fille du boucher

Boeuf Bourguignon

boeuf bourguignonAs I am moving into the new year and recovering from the flu I am drawn to less complicated foods.  The days are not as short as they were a month ago, but the cold still makes me want comfort food – slow food, braised meats, and sauces I can dip big chunks of crusty bread in.  Boeuf Bourguignon comes to mind, a comfort dish served often in the winter in my childhood.  This dish can be served family-style on a weeknight or for company on the weekend.  I like to serve it with a side of sautéed green beans and roasted potatoes.  It is also good with mashed potatoes or on its own with a tossed salad at the end of the meal.  No matter what, do not forget the bread!! If you have the patience, serve it a day later as all the flavors will be enhanced after sitting an extra day in the fridge.raw beef and bacon

BOEUF BOURGUIGNON                     (serves 6 to 8 )

  • 4 pounds beef chuck (roast or steak) cut into one inch cubes
  • 8 oz bacon cut into 1/4 inch pieces
  • 2 cups chopped onions
  • 3 cups beef stock
  • 3 cups red wine
  • 2 tablespoon tomato paste
  • 1 teaspoon thyme
  • 1 bay leaf
  • salt, pepper
  • 3 tablespoon flour
  • 4 carrots peeled, cut into 2 inch matchstick
  • 2 cups pearl onions ( I use frozen one that I thaw before using or you can use fresh ones, drop them in boiling water to loosen the skin and peel. Place in a sauteed pan, cover with water half way and simmer for 20 minutes or until tender)
  • 10 oz mushrooms quartered
  • 3 tablespoon unsalted butter
  • 1/4 cup chopped italian parsley

Preheat the oven to 350 degree.

In a large dutch oven sautée the bacon until nicely browned.  With a slotted spoon transfer the bacon to a plate with paper towel to drain.  Transfer all but 1 tablespoon of bacon fat to a small heatproof dish.  Sautée the beef in the remaining tablespoon of bacon fat until brown on all sides.  You might have to do this in 2 to 3 batches as you don’t want to crowd the pan.  Transfer the beef into a separate dish as you brown it, adding more bacon fat as needed in the dutch oven.  Once the meat is all browned, add a bit more fat in the pan and sautée the onions until soft and translucent, about 5 minutes.sauteed mushrooms

Dust the pan with the 3 tablespoon of flour and cook for about 2 minutes making sure the flour absorbs all the moisture in the pan.  Quickly whisk in the stock and wine, making sure there are no flour lumps and bring to a slow boil while stirring.  The sauce will thicken slightly.  Whisk in the tomato paste.  Add 1/4 teaspoon salt, pepper and the thyme.  Transfer the beef and bacon back into the pan, cover and cook in the oven for 2 hours.

In the meantime prepare the vegetables. In a pot of boiling water blanch the carrots for 5 minutes, drain in a colander, rinse under cold water, and set aside.  In a large sautée pan melt 2 tablespoon of the butter and sautée the quartered mushrooms until golden and crispy around the edges ( about 15 minutes ), put aside.  In the same pan, melt the remaining 1 tablespoon butter and sautée the pearl onions until they are a nice golden color ( about 10 minutes) and set aside.

When the Bourguignon is done, stir the vegetables in and return to the oven for another 15 minutes. Taste and seasoned with more salt and pepper if needed.   Add the chopped parsley before serving.  Should you decide to eat it the next day, let it cool to room temperature, keep in the dutch oven or transfer to a container, and refrigerate until ready to serve.  You can reheat in the oven or on top of the stove, stirring once in a while to make sure the bottom of the dutch oven does not burn.sauteed mushrooms and onions

NOTE:  Why cut a piece a beef rather than buying already prepared stew meat? The stew meat from the supermarket is often from different cuts of beef that will not cook the same way thus sometime causing “tough” pieces in the stew.

From my kitchen to yours,

CK, la fille du boucher

Lobster Ravioli with tarragon cream sauce

lobster ravioliEvery family has its holiday menu traditions.  Our family celebrates the Réveillon, the night before Christmas with its special menu of Coquilles Saint-Jacques and soupe à l’oignon.  Come Christmas day we have a second family meal with a different menu of beef tenderloin with mushroom sauce, Bûche de Noel, and my signature lobster raviolis.  They are delicious, easy to make and can be served as a first course or a light meal with a tossed salad.  The tarragon cream sauce gives the dish that bit of acidity that complements the rich creamy lobster filling.  We did have them on the menu yesterday but you don’t need to limit yourself to Christmas to make them as they are a great addition to any menu year round.lobster ravioli ingredients

LOBSTER RAVIOLI  (makes about 62 raviolis)

  • meat from 2 1.5 pound lobsters ( about 14 to 16 oz of meat) chopped
  • 1/4 cup scallions chopped fine
  • 1 teaspoon grated lemon rind
  • 1 tablespoon chopped fresh tarragon
  • 1 tablespoon lemon juice
  • 6 ounces cream cheese room temperature
  • salt and pepper to taste
  • 62 wonton wrappers

In a large bowl mix the lobster meat, scallions, tarragon, lemon rind and juice.  With a fork, work the cream cheese into the lobster mixture making sure it is all incorporated and that there are no large lumps of cream cheese by using your hands to lightly mix.  Taste and season with salt and pepper if needed. Set aside.lobster ravioli stuffing

On a large clean working surface lay the wonton wrappers 10 to 12 at a time.  Put about 1/2 tablespoon in the middle of each wonton.  Fill a small bowl with warm water.  Dip your finger or a small pastry brush in the water and wet the edge of the wonton, fold into a triangle, and press the wet edges together sealing the filling inside.  Repeat until you have used all the filling. As you make the raviolis, put them on a baking sheet that has been dusted with a bit of cornstarch to avoid the raviolis sticking to each other or the surface. As you will have more then can fit the baking sheet, cover the first layer loosely with a piece of wax or parchment paper also dusted with cornstarch.  When done loosely cover with plastic wrap and put in the fridge until ready to cook.lobster ravioli

When ready to cook, bring water to boil in a large pot.  Gently put the raviolis in the boiling water, 8 to 10 at a time ( do not crowd the pot)  for about 1 to 2 minutes.  The raviolis come to the surface when cooked.  Remove with a slotted spoon and serve in individual shallow bowls or plates with a couple of tablespoons of sauce.

TARRAGON CREAM SAUCE

  • 10 to 12 peppercorns
  • 2 branches fresh tarragon
  • 1 cup dry white wine
  • 1.5 cup vegetable broth
  • 1 small shallot chopped
  • 2 tablespoons butter
  • 3 tablespoons flour
  • 1/2 cup heavy creamcooking lobster ravioli

Put the peppercorn, tarragon, wine, broth and shallot in a small saucepan.  Bring to a boil and let reduce for about 20 minutes.  Pour the mixture through a fine mesh strainer, discard the solids and save the liquid.  In another small saucepan melt the butter, add the flour, and cook for 1 minute letting the flour absorb the butter.  Whisk in the broth and cook for 5 minutes letting the mixture thicken slightly.  Reduce the heat to low and slowly whisk in the heavy cream.lobster ravioli

NOTE:  The raviolis and the sauce can be made 1 to 2 days ahead.  Make sure that you don’t bring the sauce to a boil when reheating it as the cream can separate. Otherwise you can make the sauce and add the cream when ready to serve. As a first course I serve 4 to 5 raviolis per person.

From my kitchen to yours,

CK, la fille du boucher

Moules Marinieres

bowl of musselsDuring the holiday season things can get pretty hectic – but I refuse to compromise on eating a nice meal because we are all in a hurry.  Here is a recipe that is a total reward: quick, delicious and in-season ingredients.  You can use it as a first course or as a meal accompanied by a nice tossed salad.  This is a dish from my childhood, my parents would make it in the fall and winter.  As children we loved it!  We were allowed to eat with our hands and have as much bread as we wanted! You will need that bread to soak up all the delicious left over broth in your bowl.mussels

Mussels are pretty much available year-round now but they tend to be plumper in the winter.  I recommend buying them the same day you will cook them, store them in the fridge in a bowl uncovered with NO water so they can breathe.  The ones you buy at the store are farm-raised so you only need to give them a quick rinse before using them.washing mussels

MOULES MARINIÈRES

  • 4 to 5 pounds mussels
  • 2 to 3 tablespoon unsalted butter
  • one large or 2 small tomatoes, peeled, quartered, seeded, and chopped
  • one leek, cleaned, cut in half length wise and sliced thin (white and light green part) or one large onion chopped
  • 3 garlic cloves minced
  • 2/3 cup dry white wine or white vermouth
  • 1/3 cup chopped parsley

In a very large stockpot (large enough so you will be able to move the mussels around as you stir) melt the butter.  Add the garlic and leek or onion and sautée until it starts getting soft, about 3 minutes.  Add the tomatoes and stir until they are soft and release a bit of their juice, another 2 minutes.  Add the cleaned mussels and stir until they have all been covered by the vegetables.  Add the wine or vermouth and cover the pot allowing the mussels to steam.  After 10 minutes check the pot and give the mussels a stir checking at the same time to make sure they have opened. Put the lid back on, turn off the heat and let sit another 3 minutes.  Before serving toss with the parsley.mussels

Transfer the mussels in a large bowl or individual bowls, discarding any unopened mussels. Serve with chunks of crusty bread.bread basket

NOTE:  I am partial to the mussels from Prince Edward Island and Newfoundland.  Should you decide to make the recipe you can also go to the following site and view my video tutorial on how to make the dish.

from my kitchen to yours,

CK, la fille du bouchermussel shells

Oysters!

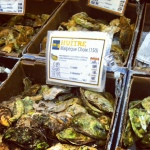
oystersI will eat oysters over chocolate …and  I mean a good dark chocolate.  If I really want to “treat” myself, I’ll run to the store and buy a dozen oysters and we’ll have them as an appetizer with a nice glass of sparkling white wine.  It’s one of those foods that makes me happy – and fortunately my husband, Philippe, not only feels the same way, but is also the best at chucking! We are very partial to the oysters from Prince Edward Island and New Brunswick:  Malpeque, Caraquet, Raspberry Point, Beausoleil, French Kiss…  So when we visit my family in Montreal we make a stop at our favorite poissonnerie, Odessa, fill up the cart with oysters, and off we go to my parents.oysters at the market

All you need to enjoy your oysters is a proper knife and your favorite sauce. When it comes to the knife you need one with a sturdy blade – a nice point to open the oyster but also flat to get around the shell to open it.  As for the sauce, some use tabasco, lemon, or cocktail sauce.  I am partial to Mignonette Sauce.oyster and sauce

MIGNONETTE SAUCE

  • 1/2 cup red wine vinegar
  • 2 tablespoon finely chopped shallots
  • cracked pepper

Mix all ingredients in a small bowl and serve with the oysters.

NOTE: only eat oysters in a month with “r” ! Where does that come from? Oysters spawn from May to August and tend not to be as plump and flavorful.  Plus there is the added factor of eating raw seafood in the heat of summer and the fear of getting food born illnesses.chucking oysters

From my kitchen to yours,

CK, la fille du boucher

Persimmon Avocado Salad

persimmonsNowadays with fruits and vegetables available year round, there is something special and wonderful about produce that is only available for a short interval of time each year.  When you stop and really think about it, along with shorter days, cold and snow, winter brings some incredible produce: pomegranates, meyer lemons, chestnuts, quince, and one of my personal favorites: Persimmons.  I go to Russo’s in Watertown and buy them by the case! And then it’s persimmons and yogurt for breakfast, persimmons served with a cheese course, persimmon as a snack instead of an apple, and persimmons in a salad either as a light first course or as beautiful ending to our meal.  Enjoy them while they last! It’s a short and delicious season!

PERSIMMON AVOCADO SALAD (serves 4) I count 1/2 persimmon and 1/4 avocado per person

  • 2 fuyu persimmons, blossom removed and peeled
  • 1 avocado
  • 1 cup baby arugula
  • 1 recipe of lemon vinaigrette or your favorite

Cut the persimmons in half and slice each half into 1/4 inch pieces.  Quarter the avocado, peel and slice into 1/4 inch pieces the short way.

On a platter, spread the baby arugula as a base and scatter the persimmons and avocado.  Drizzle with half the vinaigrette and serve immediately.persimmon avocado salad

NOTE:  there are 2 kinds of persimmons (1) Fuyu: short, firm, round, crisp, and better suited for salads… (2) Hachiya : longer and “pointy” shaped that needs to get very very soft to be eaten.  You can just dig in with a spoon and eat the flesh which has a slight honey taste.

From my kitchen to yours,

CK, la fille du boucher

Ricotta cheese and Zucchini Gnocchi

plated gnocchi in tomato sauceOne of the great thing about my work as a food stylist, besides being around food all day, is that I get to meet people that are as excited and passionate about food as I am: kindred spirits. I get to translate into images the recipes of talented chefs and food writers and in the process expand my knowledge of food, cooking, and new recipes.

Two summers ago I had the opportunity to style Mary Ann Esposito’s cookbook “Ciao Italia, Family Classics” .  We were on an Italian diet for about two weeks; it was delicious! I always come out of a project adding a recipe to my collection – on this one it was the ricotta zucchini gnocchi.  Mary Ann introduces the recipe by saying that “if ever there was a homemade pasta that put the fear of God in cooks, it has to be gnocchi”… fear of God in stylists too! They can so easily turn out wrong: chewy, tasting heavy, or worse – disintegrate once dropped in water.  Following the recipe carefully turned out to be a success.  I have been making them for two years now and never tire of them.  The recipe is so simple I even make them while on vacation. Thank you Mary Ann!gnocchi ingredients

RICOTTA CHEESE AND ZUCCHINI GNOCCHI

  • 1 medium zucchini, ends trimmed and cut in half
  • 1.5 cup unbleached all purpose flour
  • 1 teaspoon salt
  • 3 tablespoons grated Pecorino cheese
  • one 16 once container whole milk ricotta cheese, well drained
  • 1 egg slightly beaten
  • 2 cups prepared tomato sauce

Grate the zucchini using a cheese grater.  Wrap the zucchini in a towel and squeeze the excess water out.  The zucchini needs to be VERY dry otherwise too much flour will be used and your gnocchi will have you tearing out your hair.  Aim for 1 cup well squeezed zucchini.  Set asidegrated zucchini

Heap the flour on a work surface, add the salt and cheese and blend well with your hands.  Make a hole in center of the flour mixture and plop the ricotta cheese in it.  Flatten the cheese a bit with a spoon to make a slight depression in the center of the cheese and add the egg and zucchini.  It will look like a mess.cutting gnocchi dough

Roll up your sleeves and use your hands to blend everything into a ball of dough.  It will be a bit sticky , but only add more flour if the dough is so soft it will not roll into a slightly tacky ball.  Otherwise leave it alone and allow it to sit covered for 5 minutes while you wash the excess flour dough bits off your hands.

You will find that after the dough rests, it will be easier to handle.  Use a dough scraper to help you move and turn the dough to knead it.  It does not have to be smooth, but just holding together.  To test if you have enough flour in the dough for the gnocchi to hold together in cooking, drop one or two in a small pan of boiling water.  If they rise to the top and hold together and do not disintegrate, Congratulations! you are good to go! If they fall apart, you need to add more flour.making gnocchi

Divide the ball into quarters and roll each quarter out on a lightly floured surface into and 18 inch long rope the thickness of your middle finger.  With a small knife cut one inch pieces from each rope.

Place the gnocchi on a towel lined baking sheet in single layers as your form them.gnocchi

When ready to cook and sauce, decide how many are being served.  Gnocchi are a first course so four dozen will serve 8.  Bring 2 quarts of water to a boil and add one tablespoon of salt; drop the gnocchi by hand a few at a time into the pot and cook them just until they bob to the surface.

Use a sieve or a pasta scoop with a handle to fish them out of the water.  Be sure to shake off the excess water and transfer them to a skillet with the waiting tomato sauce.cooking gnocchi

Heat the gnocchi in the sauce and toss them gently to coat well.  Serve them as a first course with cheese on the side to sprinkle on top.

You can also serve them with pesto or butter and cheese.

MARY ANN’S NOTE:  Want to make gnocchi ahead?  Cooked gnocchi freeze beautifully.  Flash-freeze cooked gnocchi on baking sheets in a single layer.  When frozen, transfer in plastic ziplock bags.  They will keep for 3 months.  When ready to cook, take out as many as you wish and allow them to defrost then reheat them in the sauce of your choice.

MY NOTE:  For a really tasty and fluffy gnocchi use handcraft ricotta.  My favorite is Maplebrook made in Bennington Vermont and available at Whole Foods Supermarket.empty pasta plate

From my kitchen to yours!

CK, la fille du boucher

Lobster Stew with cheddar crostini

Two weekends ago,  my family and I all holed away together in New Brunswick for Canadian Thanksgiving.  We wanted to celebrate and mark this special occasion with a traditional feast, but I did not want to commit to staying home all day nursing a turkey and all its accompaniments and miss out on a beautiful hike.  Plus, we will have our turkey next month in the U.S. – not to mention that, lets face it,  by the time October rolls around I am a bit “turkey-ed out,” as I have been cooking (aka styling) thanksgiving spreads for different clients since July.

Lobster seemed to be the perfect solution, and quite fitting since we are on an island where the economy is based on  fishing and lobstering.  My only problem:  how to prepare it.  I wanted it to feel special yet uncomplicated.  I didn’t want to serve it grilled or steamed – something closer to “comfort food” seemed more fitting for October.  Lobster mac & cheese? Lobster pot pie seemed appealing, but I was worried of overcooking the lobster.  Then I thought: how about deconstructing the pot pie? More of a lobster stew with crostini?

Lobster Stew with Crostini

  • Meat from 4 medium lobsters steamed and cut into 1 inch chunks
  • 1 onion diced
  • 2 celery stalks diced
  • 2 medium carrots diced
  • 2 medium parsnips diced
  • 1 large yukon gold potato diced
  • 1 tablespoon olive oil
  • 3 tablespoon butter
  • 1/3 cup flour
  • 3 cups chicken broth
  • 2 tablespoon fresh chopped parsley
  • 2 cups milk
  • salt and pepper

In a large stock pot melt 1 tablespoon butter with the oil.  Add the onion and cook until soft and translucent, about 3 minutes .  Add the diced vegetables and sautée on medium/high heat covered for 15 minutes, stirring once in a while and checking that the vegetables don’t brown.

Add 2 tablespoon butter. Once melted, add the flour and mix well until fully incorporated.  Cook for 2 minutes.  Add the chicken broth and parsley.  Bring to a boil, reduce the heat and simmer for 10 minutes.  Add the milk and return to a simmer.  Add the lobster meat, give the stew a stir and turn off the heat.  All you want to do here is heat the lobster.

Serve in large shallow bowls with the crostini.

Cheddar Crostini

  • one baguette
  • about 1/2 pound mild cheddar

Preheat oven at 400 degrees.

Cut the baguette into 1/2 inch slices on the diagonal to get long slices. Grate or slice the cheddar. On a sheet pan, cover the baguette slices with the cheese and bake in the oven for 8 minutes or until the cheese is melted, bubbly and golden.

NOTE: When getting lobster on the island we steam it in a bit of fresh sea water – if not you can get most fish markets to steam it for you.  As for the crostini, I count 2 per person when serving the stew but make sure there are extras on the table, since we found them quite addictive!

From my kitchen to yours,

CK, la fille du boucher

Pears wrapped in prosciutto

This is more of an idea then a recipe and it’s EASY!!! Really.  All my friends roll their eyes when I say : “it’s easy” but it is really true for this one.  This time of year I like to use seckel or forelle pears.  If you can’t find them you can use medium size bosc pears.  As a first course I count one pear per person and for the bosc 1/2 pear.  I also make more then I need for the guest who wants an extra serving and for leftover the next day.  They make a  great lunch sliced cold on top of a salad.  This is what you will need for 4 people.

PEARS WRAPPED IN PROSCIUTTO

  • 6 seckel pears
  • 3/4 pound blue cheese (pick your favorite as each type varies in intensity and taste)
  • 6 slices prosciutto
  • pomegranate molasses

Wash the pears, cut in half and with a spoon dig out the seeds, creating a well .  Cut a good size nugget of the blue cheese and place in the well.  Cut the prosciutto slices in half the long way.  Wrap each pear with the prosciutto.  Place on a lightly greased cookie sheet.  Bake in the middle of  a preheated 400 degrees oven for about 20 minutes or until the cheese melts, the prosciutto gets a bit crispy and the pears soften a bit.  Let cool to room temperature and serve on a bed of arugula  individually or on a platter with a drizzle of pomegranate molasses on each pears.

NOTE: you can now find pomegranate molasses in most grocery stores. If not, you can make a balsamic vinegar glaze by reducing 1 cup of the vinegar on top of the stove at a slow boil until it thickens.  Watch carefully as it can turn rapidly from nice glaze to burnt caramel!

From my kitchen to yours!

CK, la fille du boucher