Strawberry Shortcake

strawberriesIn my world, strawberry shortcake means and says summer:  it brings to mind hot summer days with picnics, barbecues, 4th of July celebrations.  There is nothing like the taste of a strawberries freshly picked from the garden or the local farm stand:  they are small, plump, red and have the sweetest smell.  The beauty of strawberry shortcake is that from one party to the next it will taste different according to how the host flavors the strawberries, the whipped cream and what biscuit recipe is used.  I have yet to meet a person who does not like strawberry shortcake.  Here is my version … Happy 4th of July!shortcake making

STRAWBERRY SHORTCAKE

  • 8 cups strawberries, washed and halved
  • 1/4 cup lemon verbena simple syrup
  • one recipe whipped cream
  • one recipe baking powder biscuits

Half hour to 45 minutes before you will serve dessert, mix the strawberries and the syrup. If you do not have the syrup, mix the berries with 3 tablespoons of sugar and one tablespoon of vanilla extract.  Let sit.

BAKING POWDER BISCUITS (makes about a dozen)  I get my recipe from Martha Stewart’s Baking Handbook.photo-106

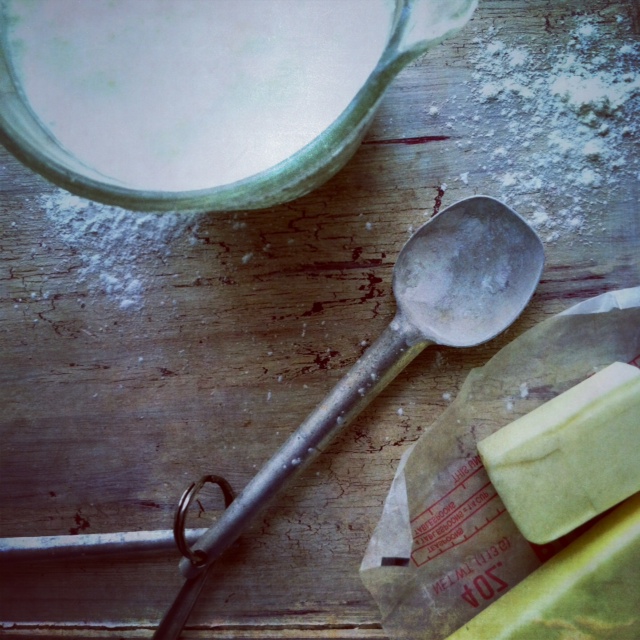
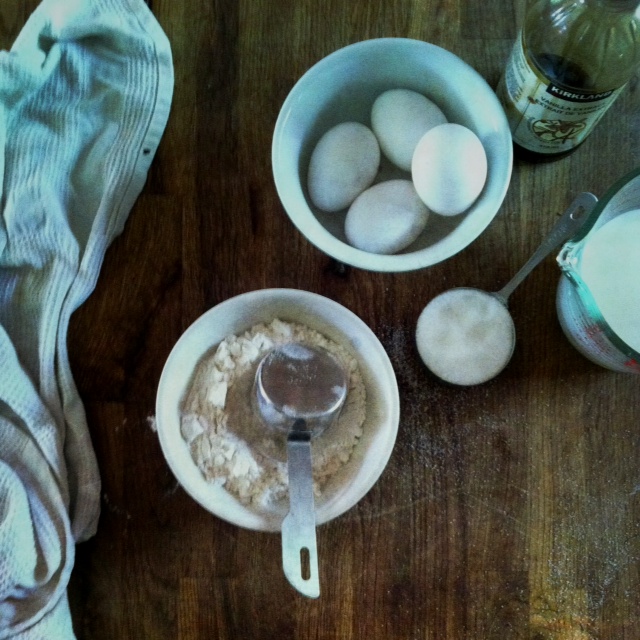
  • 4 cups all purpose flour, plus extra for dusting
  • 2 tablespoon baking powder
  • 1/2 cup sugar
  • 1 teaspoon salt
  • 1.5 sticks unsalted  butter (3/4 cup)
  • 2 cups heavy cream
  • one egg wash (one lightly beaten egg)

Preheat the oven at 400 degrees.  in a large bowl. whisk together the flour, baking powder, sugar and salt.  Using a pastry blender, cut the butter until the mixture resembles coarse crumbs with a few larger clumps remaining.biscuit making

Pour in the heavy cream; using a rubber spatula, fold the cream into the dough, working in all directions and incorporating crumbs at the bottom of the bowl, until the dough just comes together.  The dough will be slightly sticky.

Turn the dough into a lightly floured surface.  With floured fingers, gently pat the dough into a round about 1 1/4 inch thick, pressing any loose bits.  Do not overwork the dough.  Use a floured 2 1/4 inch round biscuit cutter to cut out the biscuits as close as possible, using one cut edge as the edge for the next biscuit.shortcakebaking shortcake

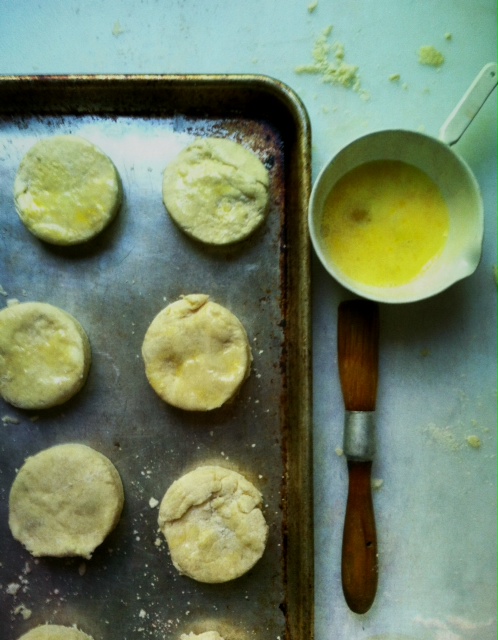
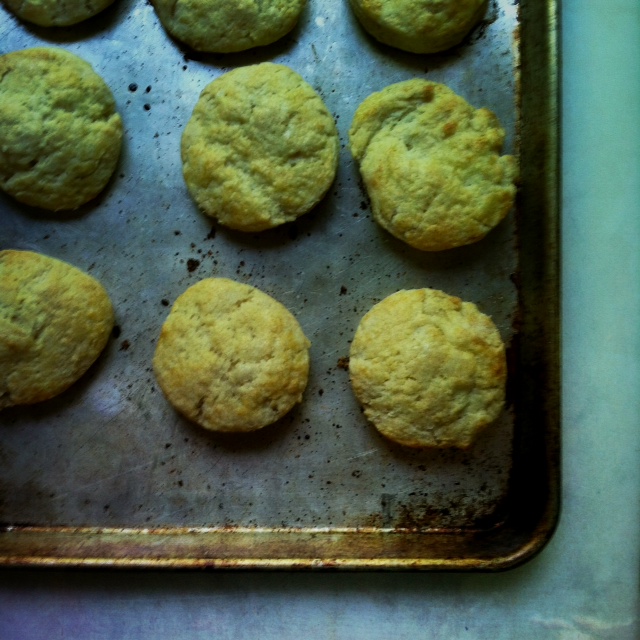
Place the biscuits on an unlined baking sheet about 1 1/2 inches apart.  Before baking, brush rounds with the egg wash and sprinkle with sugar if desired.  Bake, rotating the sheet halfway through, until the biscuits are golden and flecked with brown spots, 20 to 25 minutes.  Transfer the biscuits to a wire rack to cool.

FLAVORED WHIPPED CREAM

  • 1 cup heavy cream
  • 2 tablespoon mascarpone
  • 2 tablespoon sugar
  • 1 tablespoon limoncello (optional)strawberries and cream

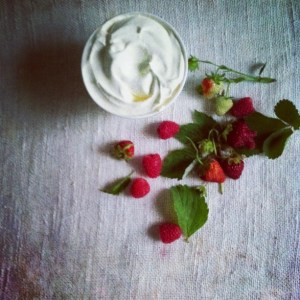
In a large bowl whipped the heavy cream until soft.  Slowly mix in the rest of the ingredients   and beat until a bit more soft but not stiff.

When ready to serve, split the biscuits in half horizontally with a serrated knife.  Place the bottom part of the biscuit on a plate, spoon a dollop of the cream, spoon some strawberries and accumulated juice and cover with the biscuit top.  Serve with remaining cream and strawberry mixture.strawberry shortcake

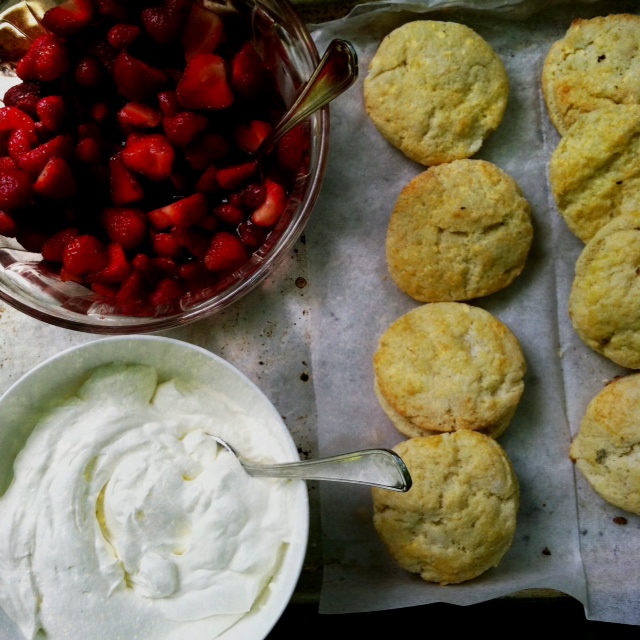
NOTE: If you do not have a biscuit cutter you can use a glass but make sure to do a clean cut without twisting the glass in the dough as it will stop the biscuit from rising when baking.

From my kitchen to yours,

CK, la fille du boucher

Clafoutis aux Apricots / Apricot Clafoutis

apricotsGoing to the market toward the end of June can be a great source of inspiration.  The sun is shining, the temperature is rising, and beautiful produce begin appearing on the shelves. Among the cherries and local strawberries, one will find apricots.  If you are lucky you might even find  black velvet apricots.  I cannot resist them: poached, grilled, simply cut in yogurt in the morning, and this time… a clafoutis.black velvet apricots

The best part about this dessert is that you make it in a blender… so easy and not a lot to clean up! My mother is a great baker and I grew up eating the classic clafoutis, one made with cherries.  I am a bit more of an adventurous baker thus the apricots.

CLAFOUTIS AUX APRICOTS

  • 10 to 12 ripe apricots, pitted and cut in half
  • 1/3 plus 2 tablespoon sugar separated
  • 1 tablespoon unsalted butter softened
  • 1 1/4 cup milk
  • 4 large eggs
  • 1/2 cup flour
  • pinch of salt
  • confectioner sugar for dusting

clafoutis ingredientsPreheat the oven at 350 degrees.  Butter  a 10 inch quiche/tart pan 2 inches high (NOT a removable bottom tart pan).  Line the bottom of the pan with the apricots and dust with the 2 tablespoon of sugar.

Put the rest of the ingredients in a blender and blend on high for about 1 minute, until all the ingredients are blended into what will look like a homogeneous smoothie like substance.making clafoutis

Slowly pour over the apricots (it’s ok if some of the fruits are not totally covered). Bake for 45 minutes in the middle rack of the preheated oven.

When ready: the clafoutis should be golden, puffy and a knife inserted in the middle should comes out clean, let rest 10 minutes. Sprinkle with a dusting of confectioner sugar and serve. Clafoutis are best eaten warm or room temperature.dusting apricots with sugar

NOTE: Experiment with other stone fruits : cherries, regular or italian plums when in season.apricot clafoutis

from my kitchen to yours,

CK, la fille du boucher

Flan au sirop d’erable / Maple flan

maple syrupA couple of weeks ago we caravanned to Montreal with a group of friends.  We were on our way to Martin Picard’s  La Cabane a sucre du Pied de Cochon.  Cabane a sucre / maple shack is a big Quebecois tradition.  We are proud of our maple syrup and no other one will do! Chef Picard has Le Pied de Cochon restaurant in Montreal and la Cabane outside of the city.  I had made the reservations back in December crossing my fingers we would get in and found out in February that yes! we did get a table.  The whole experience was worth the wait!cabane a sucre pdc

Growing up in Montreal, the Cabane a sucre was a yearly tradition; one of family times as well as school field trips.  My husband has seen his share of cabanes when we were first married and lived in Montreal, but with my children born and raised in the U.S. it was a real treat to have them experience this food extravaganza for the first time in their lives.

Needless to say when we came back we were on a vegetable-only diet for a while but maple syrup kept being on my mind.  We even ended up smoking our ham for Easter and basting it with a maple glaze, but that is another post.  In the meantime enjoy simple, easy-to-make Maple Flan.flan maple

FLAN AU SIROP D’ERABLE / MAPLE FLAN

  • 1 cup sugar
  • 6 tablespoon maple syrup divided
  • 1 cup half and half cream
  • 2 cups whole milk
  • 4 large eggs
  • 6 large egg yolks
  • 1 tablespoon vanilla extract

Preheat the oven at 350 degrees.

In a medium size saucepan combine the sugar with 3 tablespoon maple syrup and cook on medium heat until the mixture is thick , bubbly and amber color.  The mixture will be very hot and you will have to work quickly.  Pour into a flan pan : I use a 10 inch round about 1 3/4 inch high pan.  With oven mitts (remember the mixture is very hot!) quickly swirl the mixture to cover the entire surface of the bottom of the pan. Set aside.

It is very important while making the caramel to NOT stir the mixture constantly as it will burn and get hard.  Stir to start and then just let it be.  You want to pour it in the pan when it is all melted and amber.  Be quick as it can go from amber to burnt!

In the same saucepan you used for the caramel, quickly pour the cream and milk and return to the stove and heat up but do not bring to a boil.flan

In the meantime, in a large bowl whisk the eggs, yolks, vanilla and remaining 3 tablespoon of maple syrup.  Slowly pour the hot milk/cream mixture and keep whisking until smooth.

Pour the mixture into the caramel coated pan and set the pan in a large sheet pan or roasting pan.  Pour enough hot water into the pan to come up half way up the sides of the flan pan.  Cover loosely with foil and bake for an hour or until the custard is firm to the touch.

Take the pan out of the water bath and let it cool to room temperature, about 30 minutes. Loosely cover with plastic wrap and refrigerate until chill, about 3 hours.

When ready to serve, run a thin knife around the edge of the pan, cover with a large shallow plater ( as you will have a fair amount of syrup coming out of the dish) and quickly invert the flan onto the platter.  Slice onto plates and make sure you spoon lots of of the syrup with each serving!flan

NOTE:  Please! do NOT use fake maple syrup !!! it will ruin the taste , if you do not have maple syrup, use honey: for the caramel part, add 2 tablespoon of sugar to the one cup and for the custard substitute honey for maple syrup.  One more note, I could not go to the Cabane and not have my picture taken with Martin Picard.  Merci  Chef for your generosity and for being such a source of inspiration!!martin picard

Brownies

brownies on pewter pedestalWe have all made our share of brownies. In fact, it was the first dessert I ever baked.  I was too afraid to make a cake and deal with frosting, and preferred being rewarded by a chocolate success that everybody is more then happy to devour.  Some people like their brownies “cakey” others “gooey” – I like mine à la Nigella.  When I got her book How to Be a Domestic Goddess back in 2001 I discovered her brownie recipe and have been using it ever since.  Everybody I have served them to exclaims how wonderful “my” recipe is and all I can say is Oh! Thank you Nigella for turning me into a domestic goddess!  Try it and judge for yourself, I’m sure you too will make it your brownie recipe.brownie ingredients

BROWNIES (by Nigella Lawson)

  • 1 2/3 cup soft unsalted butter (3 sticks and 3 tablespoons)
  • 13 ounces BEST bittersweet chocolate
  • 6 large eggs
  • 1 tablespoon vanilla extract
  • 1 2/3 cup sugar
  • 1 1/3 cup flour
  • 1 teaspoon salt

Preheat the oven to 350 degrees.  Line a brownie pan (13 x 9 x 2.5 inches) with parchment paper.

Melt the butter and chocolate in a double boiler, set aside and let cool.

In a bowl, beat the eggs with the vanilla and sugar.  Measure the flour into another bowl and add the salt.brownie making

Transfer the cooled chocolate into a bowl.  Beat in the eggs/sugar mixture and then the flour.  Beat to combine smoothly and then scrape into the lined pan.brownies

Bake for about 25 minutes.  When it’s ready, the top should be dried to a paler brown speckle, but the middle still dark, dense and gooey.  And even with such a big batch you do need to keep alert, keep checking: the difference between gungy brownies and dry brownies is only a few minutes; remember that they will continue to cook as they cool.

NOTE: I like my brownies plain but you can add 1 1/3 cup of walnuts or other nuts, white chocolate chips, dried cranberries or shredded coconut.brownie and milk

From my kitchen to yours,

CK, la fille du boucher

Blood orange sherbet

blood orangesBlood oranges are in season and since it is a short one, I can’t resist buying them.  They are wonderful eaten as is, in fruit salads or on a bed of greens.  They are not as acidic as regular oranges and their sweet juice makes wonderful cocktails.  I love them as a soda : Orangina Rouge and the Sanpellegrino Aranciata Rossa being two of my favorites.  Trying them as a sherbet was even better! The dramatic red of the juice turned into a beautiful pink frozen dessert so light and refreshing, the perfect ending to our Sunday meal.juicing blood oranges

BLOOD ORANGE SHERBET

  • 2 cup sugar
  • 2 cup water
  • 1 1/2 blood orange juice (from about 10 to 12 oranges) cold
  • 1/2 cup heavy cream

In a medium saucepan mix the sugar and water.  Bring to a boil and simmer for 3 to 5 minutes, making sure the sugar is totally dissolved.  You will have what is called a simple syrup.  Cool to room temperature and refrigerate until cold (about a  hour).simple syrup ingredients

In a large measuring cup with a spout, mix the cold syrup, juice and heavy cream.  Pour into an ice cream maker and process according to the manuel ‘s instructions.

Once processed, transfer the sherbet into a freezer safe container and freeze for about 6 hours or overnight .  When ready, just scoop and eat.  The sherbet will keep in the freezer for about a week.blood orange sherbet

NOTE:  you can make the recipe without the heavy cream, you will then have a sorbet as sherbet usually has dairy and sorbet is fruit juice or puree with simple syrup.  I just like that creamsicle taste and feel, thus the heavy cream.

From my kitchen to yours,

CK, la fille du bouchersherbet and scoop

Panforte

panforteI never make fruitcake – I have never had to and why should I when my mother makes a great one and I am always sure to get a loaf to bring home come Christmas.  Panforte is another story, and it has become a tradition in my family.  I was introduced to it when I first moved to Boston in the early 80’s and worked at Rebecca’s on Charles Street.  I was familiar with nougat but this variation with its intense citrus chocolate flavor won me over.  Getting to be on the team for the Boston Globe Magazine food page on Sundays 8 years ago not only brought a new friend (Adam Ried) into my life, but also a ton of his fool-proof recipes – panforte being one of them.panforte

PANFORTE (makes an 8 or 9 inch panforte)

  • unsalted butter for the pan
  • 2 teaspoons plus 1/4 cup unsweetened Dutch-process cocoa powder
  • 1 tablespoon ground cinnamon
  • 1/2 cup all -purpose flour
  • 2 teaspoons ground ginger
  • salt and pepper
  • 1/8 teaspoon ground cloves
  • pinch freshly grated nutmeg
  • 1 1/3 cups chopped candied orange peel (8 onces)
  • 2.5 cups hazelnuts, lightly toasted, skinned (wrap toasted nuts in a kitchen towel and rub to remove skins), and roughly chopped (about 12 ounces )
  • 3/4 cup honey
  • 3/4 cup granulated sugar
  • 2 ounces bittersweet dark chocolate, melted
  • confectioner’s sugar, for dusting

Set the rack in the middle position of the oven and heat to 300 degrees.  Generously butter an 8 or 9 inch springform pan, line the bottom with parchment paper and butter the paper.  In a small bowl, mix 2 teaspoons of the cocoa powder and 1/2 teaspoon cinnamon, dust the pan with the mixture and set pan aside.skinning hazelnutschocolate dusted pan

In a medium bowl, whisk together the remaining cocoa powder, remaining cinnamon, flour, ginger, 1/8 teaspoon salt, 1 teaspoon pepper, cloves and nutmeg.  Add the orange peel and work it into a mixture with your fingers, separating and coating the pieces.  Add the hazelnuts and toss to combine.chocolate and orange peel

In a small saucepan, over medium heat and stirring occasionally, bring the honey and granulated sugar to a strong simmer; continue to simmer without stirring until the mixture registers 240 degrees on an instant-read thermometer, about 51/2 minutes.  Add the honey-sugar mixture and the melted chocolate to the orange-nut mixture and rapidly stir to combine well.  Pour the batter into the prepared pan and with wet hands or the back of a large spoon, press the batter into an even layer.panforte mixpanforte

Bake until the panforte is firm and the surface is glossy, about 35 minutes.  Cool for 30 minutes, remove the sides of the pan and cool the panforte completely before removing the parchment paper.  Dust the top, bottom and sides of the panforte generously with confectioner’s sugar and rub it in with your fingers.  Serve cut in thin wedges.  Wrapped well and stored in an airtight container at room temperature, the panforte keeps for about one month.  You can dust it with more confectioner’s sugar before serving.panforte.2

ADAM’S NOTE:  work quickly once you add the honey syrup to the other ingredients, as the mixture will begin to stiffen almost immediatelypanforte

MY NOTE: I sometimes use orange infused chocolate for a deeper orange flavor.  Both Lindt and Taza make good flavored chocolate.

From my kitchen to yours,

CK, la fille du boucher.panforte with rum

Peppermint Bark

crushed candy caneCome December I go in full kitchen-gift-giving mode.  Along with bottling the limecello and limoncello that have been macerating for the last five weeks, I start making peppermint bark.  It has been a 15 year tradition and everyone looks forward to getting  their peppermint bark for the holidays: friends, family, co-workers and neighbors.  I must admit I look forward to making it, and finding the right container to package it in is a big part of the fun .  Unwrapping the candy canes can however be a sticky mess:  tacky fingers and the static from the cellophane wrapper transforms the kitchen into a battle field. On the other hand, watching the white chocolate melt into a glossy, creamy sauce and the smell of peppermint permeating the kitchen makes the battle worth while.  Truth be told – my peppermint bark is not mine but Martha’s . I found the recipe years ago in a December issue in the “good thing” section of MS Living Magazine. I make a few batches, break the bark into chunks, pack them in pretty containers and give them away!  It is indeed a good thing.candy cane with white chocolate

PEPPERMINT BARK

  • 12 peppermint candy canes (6oz)
  • 2 lbs white chocolate
  • 1 tablespoon peppermint extract

Cover a cookie sheet with parchment or wax paper.stirring peppermint bark

In a food processor coarsely chop (by pulsing) the candy canes.  In the meantime, in a double boiler melt the chocolate until smooth and glossy.  Off heat mix the chopped candy canes and the peppermint extract.spreading peppermint bakr

Quickly pour the mixture on the cookie sheet spreading the chocolate to cover the paper.broken bark

Let sit in the refrigerator or in a very cold room for 30 minutes or until set.

When ready…cut, break, share, give, eat.

NOTE: to all my peppermint bark recipients: don’t worry ! Posting the recipe does not mean I will stop making and giving the bark during the holiday season.bark gifts

From my kitchen to yours

CK, la fille du boucher

Mousse au Chocolat

taza chocolateI grew up in a home where my father was the cook and my mother the resident baker/dessert maker. She is always baking batches upon batches of cookies to replenish the ever-diminishing cookie jars, and is known to “whip up ” a chocolate mousse at a moment’s notice.  The latter is a necessity considering she lives with a chocoholic!  You know the type – an individual who has little “stashes” of chocolate in hidden places and when coming back from visiting said secret hiding spots can be seen to have a big fat smile on his/her face and sometimes even a bit of the evidence at the corner of his/her mouth.  The story goes that when my parents were first married my mother made her signature chocolate mousse, only to have my father consume the entire batch in one sitting.  Well, that is what we were told each time Mousse au Chocolat was on the menu at our house, along with the fact that my mother heaved a big sigh when my father was all done… ouf!chocolate mousse ingredients

Should you decide to make it, here is my mantra again: use the BEST ingredients! Best quality chocolate and fresh eggs from a farm, it will make it worth your time and effort!

MOUSSE AU CHOCOLAT

(makes 4 to 6 servings )

  • 4oz bittersweet chocolate
  • 1 tablespoon unsalted butter
  • 4 fresh eggs room temperature, separate

In a double boiler, melt chocolat and butter until smooth.  Off heat, mix egg yolk one at a time and transfer to a large bowl.  In a separate bowl, beat the egg white until stiff.  Slowly fold the egg white into the chocolate mixture until all incorporated and uniform in color. Pour into a large bowl or into individual ramequins.chocolate messmelting chocolate

Refrigerate at least one hour or overnight.  Serve with whipped cream if desired.

NOTE:  Over the years I have used the following chocolate brands: Callebaut, Lindt, Valrhona.  Now I am using Taza Chocolate (a local brand for me) and experiment with their different flavors: ginger, chili, salt&pepper, vanilla or just plain bittersweet.chocolate mousse

From my kitchen to yours,

CK, la fille du boucherempty chocolate mousse

Poached Quince

quinceQuince: the stylist in me loves their shape, their color, and the way they are overall so photogenic.  The cook in me loves their taste and their aroma as they ripen. Not quite like a pear, not quite like an apple … I can’t resist buying them, they are even so beautiful as an arrangement on the dining room table.  Last week I used them as a centerpiece on my Thanksgiving table; this weekend, they are ready for poaching.  I like them warm or room temperature, on their own with a bit of the poaching liquid or with granola and yogurt in the morning.

POACHED QUINCE

  • 3 large ripe quince peeled, cored and cut into 1/2 inch slices
  • 4 cups water
  • 1/2 cup sugar
  • 1/3 cup honey
  • one vanilla bean cut lengthwise
  • one half lemon
  • 1 stick cinnamoncut and peeled quince

In a large saucepan bring the water, sugar, honey, vanilla, lemon and cinnamon to a low boil.  In the meantime peel the quince, quartered and cored.  Quince are a little “tougher” than pears or apples so make sure you get rid of all the fibers around the core while being careful not to cut yourself in the process.

Once cut, transfer the quince to the boiling mixture.  Bring to a simmer and cover.  Simmer on low for about an hour or until the quince is tender, testing by piercing with a knife.poached quince

Let cool to room temperature and serve.  Refrigerate up to a week.

NOTE:  The poaching liquid makes a delicious base for cocktails.

From my kitchen to yours,

CK, la fille du boucher

Poached pears and mascarpone sauce

bosc pearsWhen I am looking for a light and simple dessert I always look to the fruits of the season for inspiration. Come November, with those fresh local berries long gone, my mind turns to apples and pears.  I get busy in the kitchen with stews, hardy soups, and various comfort foods that are best shared with friends and family.  What better way to end a fall or winter meal than with poached pears.  They are delicious served with their own poaching liquid and, on special occasions, can be stepped up a notch and served with a mascarpone sauce. This recipe serves 6 (half pear per person).poached pears

POACHED PEARS

  • 2 cups water
  • 2 cups white wine
  • 2 cups sugar
  • 1 whole vanilla bean cut in half the long way
  • 1 cinnamon stick
  • 5 whole cardamon pods
  • 7 whole cloves
  • 1 strand of lemon zest (about 1/2 a lemon)
  • 3 bosc pears ripe but still firm, peeled cut in half and cored

In a saucepan bring the liquids, sugar and spices to a slow simmer, making sure the sugar dissolves.  Add pears and simmer for 20 minutes.

Turn heat off and let the pears stand in the liquid until ready to serve. You can cover the surface with a cheesecloth and secure it with a plate to make sure the pears stay submerged in the poaching liquid. If serving the next day, refrigerate and bring to room temperature before serving.poached pears

When ready to serve, take pears out of the poaching liquid.  Strain the liquid through a fine mesh strainer to collect the spices.  Take the vanilla bean and scrape any left over seeds from the pod and transfer to the poaching liquid.  Serve a half pear per person in a shallow bowl with a few tablespoons of the syrup. Serve with extra syrup on the table or with the following mascarpone sauce.mascarpone sauce

MASCARPONE SAUCE

  • 3/4 cup mascarpone
  • 3/4 cup poaching liquid
  • 1/2 teaspoon cinnamon
  • 1/2 teaspoon cardamon

In a large bowl whisk all the ingredients until blended and smooth.

NOTE:  You might have poaching liquid and sauce leftover.  The poaching liquid makes a wonderful simple syrup that you can save in the fridge for up to a month and serve with bubbly water, prosecco or white wine for a nice refreshing cocktail.  The sauce can be served with other fruits or mixed in with plain yogurt.empty plate with pear stem

From my kitchen to yours!

CK, la fille du boucherforelle pears